
Articles

How to Paint Furniture and Wooden Items

Painting furniture and wooden items is one of the best and most cost-effective ways to refresh your home decor. Over time, wooden furniture can become scratched, discolored, or even your taste may change. In such cases, instead of replacing it, you can give it a new and attractive look with a basic paint job. In this article, we will review the steps for painting furniture step by step so that you can restore your wooden furniture at home without the need for a carpentry workshop.

How to Paint your Furniture at Home?

Painting wooden furniture is a practical and cost-effective process that, when done with the correct techniques, will yield professional results. Painting furniture at home requires proper surface preparation, selecting the right paint, and precise application to ensure its durability and aesthetic appeal. To paint furniture at home, you’ll need to follow several steps, including sanding, applying primer, painting, and finally, applying a topcoat. Whether you’re planning to paint wooden furniture or even wooden tables and chairs, we will detail the process in the following sections.

Step one: Preparation

Before you begin painting your furniture, the wooden surface must be properly prepared to ensure a professional and long-lasting finish. The first step is to gather all the necessary tools and materials. Depending on the type of furniture and wood, you can choose from various paints such as acrylic, oil-based, semi-polyester, or polyurethane. Additionally, using a primer or undercoat helps the paint adhere better to the surface and enhances its durability. For applying the paint, depending on the conditions and paint type, you can use a brush, roller, or an electric spray gun. Sandpaper with different grits (120 and 220) is also crucial for smoothing the surface and improving paint adhesion. Moreover, wood putty is required for filling cracks and scratches, along with a lint- cloth and thinner for cleaning. Don’t forget gloves, a mask, and newspapers to protect yourself and keep your workspace clean.

Once you have gathered your supplies, it’s time to prepare the wooden surface. If your furniture or wooden item has old paint or varnish, first sand its surface with 120-grit coarse sandpaper to remove the previous coating. If there are cracks or deep scratches on the wood, you can use wood putty, and once it dries, smooth the surface with finer 220-grit sandpaper. After sanding, wipe off any remaining dust with a damp cloth to ensure no contaminants are left on the wood. Finally, to create a uniform surface ready for painting, apply a layer of primer and allow it to dry completely. This step will help the paint adhere better to the wood, leading to a more beautiful and durable final result.

Step Two: Sanding

After the initial preparation, it’s time to sand the wooden surface, which is considered one of the most crucial steps in painting furniture. This process ensures the wood surface becomes smooth and even, allowing the paint to adhere properly. In this stage, begin by using 120-grit coarse sandpaper to remove old coatings, varnish, or any imperfections. If the wood surface has splinters or raised areas, sand with circular motions to achieve a uniform surface. Once done, wipe off the generated dust with a damp cloth to ensure no particles remain on the wood. Properly executing this step will significantly improve paint adhesion in later stages.

Step Three: Primer or Undercoat

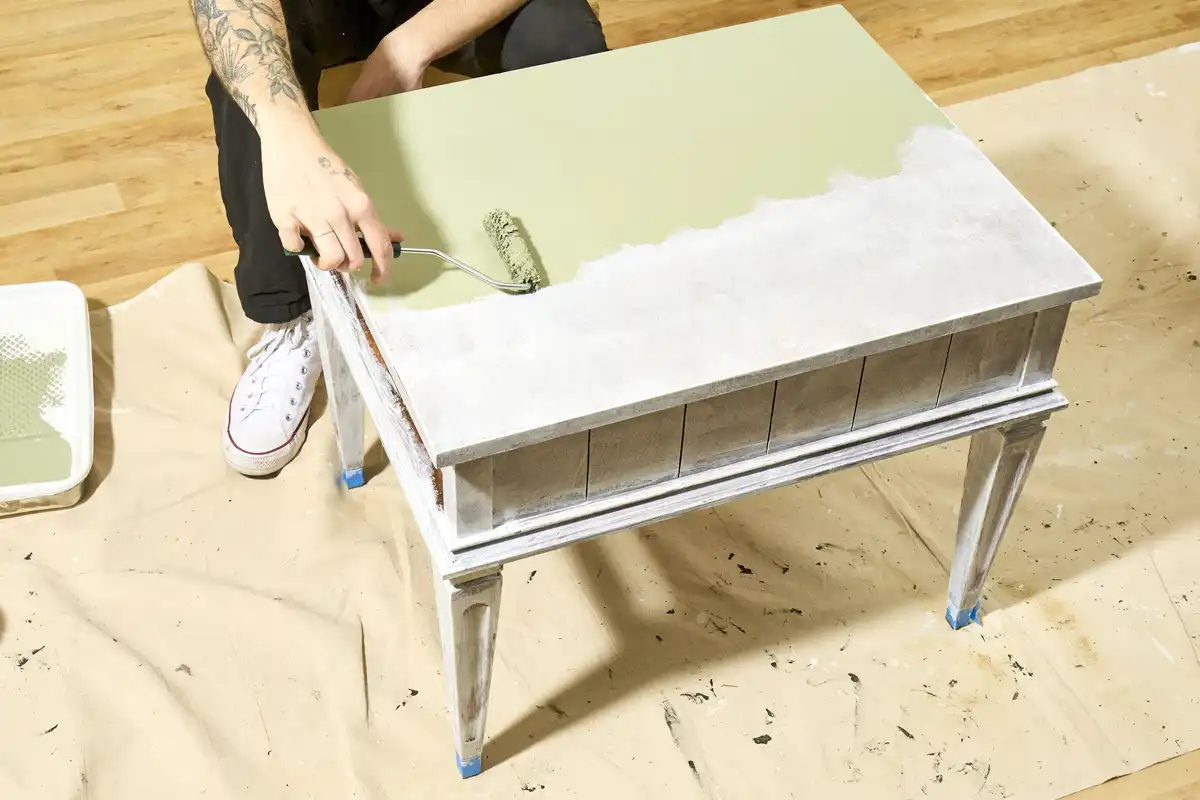
For a professional and durable paint finish, applying a primer or undercoat is essential. Primer helps the final paint adhere well to the wood, prevents it from soaking into the wood grain, and significantly increases the paint’s longevity. Primer can be applied to the wood surface using a brush, roller, or spray gun. Apply a thin and even layer of primer over the entire surface and allow it to dry completely. The drying time for primer varies by type, but it typically takes several hours. During this period, avoid touching the surface to ensure the primer sets properly on the wood. Once fully dry, the surface will be ready for the next stage.

Step Four: Re-sanding

After the primer has dried, perform a light re-sanding with finer 220-grit sandpaper. This step creates a perfectly smooth and grit- surface, ensuring the final paint application is even and beautiful on the wood. In this stage, move the sandpaper with light pressure and uniform strokes over the surface to eliminate only minor imperfections, without completely removing the primer. Once sanding is complete, clean off any dust with a damp cloth to ensure the wood surface is fully prepared for painting. Properly executing this step will make a significant difference in the final outcome, ensuring the paint on the wood surface is perfectly uniform and flawless.

Step Five: Painting

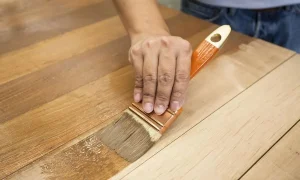
After the surface is fully prepared, it’s time to paint the furniture. First, choose the appropriate paint; oil-based, acrylic, and polyurethane paints are popular choices. Apply the paint to the wooden surface using a brush, roller, or spray gun. It is best to apply the paint in two to three thin coats to achieve a uniform and drip- finish. Between each coat, allow the paint to dry completely, and if necessary, lightly sand with 320-grit fine sandpaper to maintain a uniform surface. This will give the furniture a professional and beautiful finish.

Step Six: Protection or Finishing

After the paint dries, a protective layer must be applied to enhance the durability and beauty of the finish. This layer can include clear lacquer, varnish, or polyurethane, which protects the paint against scratches, moisture, and light. The finishing can be applied with a brush or spray gun. Allow the protective layer to dry completely, and if necessary, lightly sand with very fine sandpaper to achieve a smoother surface. This step will make the furniture’s finish shinier and more durable.

Summary

Painting furniture and wooden items at home is an excellent and cost-effective way to refresh your decor and extend the lifespan of your furniture. This process involves several essential steps, each directly impacting the final result. Initially, preparing the wooden surface involves cleaning, sanding, and using putty to create a smooth and uniform surface for painting. Then, a layer of primer is applied to enhance paint adhesion and ensure the final coating has greater durability. After the primer dries, re-sanding helps to achieve a polished and smooth surface,  of imperfections.

In the main stage, painting, choosing the right paint and applying it in several thin coats ensures the wooden surface achieves a uniform and beautiful appearance. Each coat must dry completely to prevent drips or brush marks. After painting is complete, the finishing stage involves applying clear lacquer, varnish, or polyurethane, which protects the paint against environmental factors such as moisture, scratches, and dust. This protective layer increases the paint’s durability and preserves its beauty in the long term.

دیدگاهتان را بنویسید

نشانی ایمیل شما منتشر نخواهد شد. بخش‌های موردنیاز علامت‌گذاری شده‌اند *

مقالات

آموزش رنگ کردن مبل و وسایل چوبی

رنگ کردن مبل و وسایل چوبی یکی از بهترین روش‌ها برای نوسازی دکوراسیون منزل با کمترین هزینه است. با گذشت زمان، ممکن است مبلمان چوبی دچار خط و خش، رنگ‌پریدگی یا حتی تغییر سلیقه شما شود. در چنین شرایطی، به‌جای تعویض، می‌توان با یک رنگ‌آمیزی اصولی، جلوه‌ای جدید و جذاب به آن‌ها بخشید. در این مقاله، مراحل رنگ کردن مبل را به‌صورت گام‌به‌گام بررسی می‌کنیم تا بتوانید بدون نیاز به کارگاه‌های نجاری، در خانه وسایل چوبی خود را بازسازی کنید.

چگونه مبلمان خود را در خانه رنگ کنیم؟

رنگ کردن چوب مبل یک فرآیند کاربردی و مقرون‌به‌صرفه است که با رعایت تکنیک‌های صحیح، نتیجه‌ای حرفه‌ای به همراه خواهد داشت. رنگ کاری مبل در منزل نیاز به آماده‌سازی سطح، انتخاب رنگ مناسب و اجرای اصولی دارد تا دوام و زیبایی آن تضمین شود. برای رنگ کردن مبل در خانه باید مراحل مختلفی مانند سنباده‌کشی، استفاده از پرایمر، رنگ‌آمیزی و در نهایت پوشش‌دهی را طی کنید. اگر قصد رنگ کردن چوب مبل در خانه را دارید یا حتی به دنبال رنگ‌آمیزی میز و صندلی چوبی هستید، در ادامه مراحل کار را با جزئیات بررسی خواهیم کرد.

مرحله اول: آماده سازی

قبل از شروع رنگ کردن مبل، باید سطح چوبی را به‌درستی آماده کنید تا رنگ‌آمیزی نتیجه‌ای حرفه‌ای و ماندگار داشته باشد. اولین قدم، جمع‌آوری وسایل مورد نیاز است. بسته به نوع مبل و چوب آن، رنگ‌های مختلفی مانند آکریلیک، روغنی، نیم‌پلی‌استر یا پلی‌اورتان را می‌توان انتخاب کرد. همچنین، استفاده از پرایمر یا آستر کمک می‌کند رنگ بهتر روی سطح بنشیند و ماندگاری بیشتری داشته باشد. برای اجرای رنگ، بسته به شرایط و نوع رنگ، می‌توان از قلم‌مو، غلتک یا پیستوله برقی استفاده کرد. سنباده با شماره‌های مختلف (۱۲۰ و ۲۲۰) نیز برای صاف کردن سطح و افزایش چسبندگی رنگ ضروری است. علاوه بر این، وجود بتونه چوب برای پوشاندن ترک‌ها و خط و خش‌ها، پارچه بدون پرز و تینر برای تمیزکاری و همچنین دستکش، ماسک و روزنامه جهت محافظت و جلوگیری از کثیف شدن محیط کار الزامی است.

پس از تهیه وسایل، نوبت به آماده‌سازی سطح چوبی می‌رسد. اگر مبل یا وسیله چوبی دارای رنگ یا لاک قدیمی است، ابتدا باید با سنباده زبر (۱۲۰) سطح آن را خراش دهید تا رنگ قبلی برداشته شود. در صورتی که روی چوب ترک یا خراش‌های عمیق وجود دارد، می‌توان از بتونه مخصوص چوب استفاده کرد و پس از خشک شدن، با سنباده نرم‌تر (۲۲۰) سطح را صاف کرد. پس از اتمام سنباده‌کاری، گرد و غبار باقی‌مانده را با یک پارچه مرطوب پاک کنید تا هیچ آلودگی‌ای روی چوب باقی نماند. در نهایت، برای ایجاد سطحی یکنواخت و آماده برای رنگ‌آمیزی، یک لایه پرایمر بزنید و اجازه دهید کاملاً خشک شود. با این کار، رنگ بهتر به سطح چوب می‌چسبد و نتیجه نهایی زیباتر و بادوام‌تر خواهد شد.

مرحله دوم: سنباده زنی

پس از آماده‌سازی اولیه، نوبت به سنباده‌زنی سطح چوب با سنباده زن می‌رسد که یکی از مهم‌ترین مراحل رنگ کردن مبل محسوب می‌شود. این کار باعث می‌شود سطح چوب صاف و یکدست شود و رنگ به‌خوبی روی آن بنشیند. در این مرحله، ابتدا از یک سنباده زبر با شماره ۱۲۰ استفاده کنید تا پوشش‌های قدیمی، لاک یا هرگونه ناصافی از بین برود. اگر سطح چوب دارای تراشه‌ها یا برجستگی‌هایی است، با حرکات دایره‌ای سنباده بزنید تا سطح آن یکنواخت شود. پس از اتمام این کار، گرد و غبار ایجادشده را با یک پارچه نم‌دار پاک کنید تا هیچ‌گونه ذراتی روی چوب باقی نماند. انجام صحیح این مرحله، به چسبندگی بهتر رنگ در مراحل بعدی کمک خواهد کرد.

مرحله سوم: پرایمر یا آستر

برای داشتن یک رنگ‌آمیزی حرفه‌ای و بادوام، استفاده از پرایمر یا آستر ضروری است. پرایمر کمک می‌کند که رنگ نهایی به‌خوبی روی چوب بچسبد، از نفوذ رنگ به بافت چوب جلوگیری کند و همچنین ماندگاری رنگ را افزایش دهد. پرایمر را می‌توان با قلم‌مو، غلتک یا پیستوله روی سطح چوب اعمال کرد. لایه‌ای نازک و یکنواخت از پرایمر را روی کل سطح بزنید و اجازه دهید کاملاً خشک شود. مدت‌زمان خشک شدن پرایمر بسته به نوع آن متفاوت است، اما معمولاً چند ساعت طول می‌کشد. در این مدت، از لمس کردن سطح خودداری کنید تا پرایمر به‌خوبی روی چوب تثبیت شود. پس از خشک شدن کامل، سطح آماده برای مرحله بعدی خواهد بود.

مرحله چهارم: سنباده زنی مجدد

بعد از خشک شدن پرایمر، یک سنباده‌زنی مجدد با سنباده نرم‌تر (شماره ۲۲۰) انجام دهید. این کار باعث می‌شود سطحی کاملاً صاف و بدون زبری ایجاد شود و رنگ نهایی به‌شکلی یکدست و زیبا روی چوب قرار بگیرد. در این مرحله، سنباده را با فشار کم و حرکات یکنواخت روی سطح بکشید تا فقط برجستگی‌های جزئی از بین برود، بدون اینکه پرایمر کاملاً برداشته شود. پس از اتمام سنباده‌زنی، گرد و غبار را با یک پارچه مرطوب تمیز کنید تا سطح چوب کاملاً آماده رنگ‌آمیزی شود. انجام این مرحله به‌درستی، تفاوت زیادی در نتیجه نهایی کار ایجاد خواهد کرد و باعث می‌شود رنگ روی سطح چوب کاملاً یکنواخت و بدون نقص باشد.

مرحله پنجم: رنگ آمیزی

پس از آماده‌سازی کامل سطح، نوبت به رنگ‌آمیزی مبل می‌رسد. ابتدا رنگ مناسب را انتخاب کنید؛ رنگ‌های روغنی، آکریلیک و پلی‌اورتان از گزینه‌های پرکاربرد هستند. رنگ را با قلم‌مو، غلتک یا پیستوله روی سطح چوبی اعمال کنید. بهتر است رنگ را در دو تا سه لایه نازک بزنید تا نتیجه‌ای یکدست و بدون شره حاصل شود. بین هر لایه، اجازه دهید رنگ کاملاً خشک شود و در صورت نیاز، یک سنباده نرم (شماره ۳۲۰) بزنید تا سطح یکنواخت باقی بماند. این کار باعث می‌شود رنگ مبل جلوه‌ای حرفه‌ای و زیبا داشته باشد.

مرحله ششم: محافظت یا فینیشینگ

پس از خشک شدن رنگ، برای افزایش دوام و زیبایی کار، باید یک لایه محافظ روی آن اعمال شود. این لایه می‌تواند شامل لاک شفاف، وارنیش یا پلی‌اورتان باشد که از رنگ در برابر خط و خش، رطوبت و نور محافظت می‌کند.  فینیشینگ را می‌توان با قلم‌مو یا پیستوله اجرا کرد. اجازه دهید لایه محافظ کاملاً خشک شود و در صورت نیاز، یک سنباده خیلی نرم بزنید تا سطح صیقلی‌تر شود. این مرحله باعث می‌شود رنگ مبل درخشان‌تر و ماندگارتر باشد.

جمع بندی

رنگ کردن مبل و وسایل چوبی در خانه یک روش عالی و مقرون‌به‌صرفه برای تغییر دکوراسیون و افزایش طول عمر مبلمان است. این فرآیند شامل چندین مرحله اساسی است که هر کدام تأثیر مستقیمی بر نتیجه نهایی دارند. در ابتدا، آماده‌سازی سطح چوبی با تمیز کردن، سنباده‌زنی و استفاده از بتونه انجام می‌شود تا سطحی صاف و یکدست برای رنگ‌آمیزی فراهم شود. سپس، یک لایه پرایمر به کار می‌رود تا چسبندگی رنگ افزایش یابد و پوشش نهایی دوام بیشتری داشته باشد. پس از خشک شدن پرایمر، سنباده‌زنی مجدد کمک می‌کند سطح کار صیقلی و بدون ناصافی باشد.

در مرحله اصلی، یعنی رنگ‌آمیزی، انتخاب رنگ مناسب و اعمال آن در چند لایه نازک باعث می‌شود سطح چوبی جلوه‌ای یکدست و زیبا پیدا کند. هر لایه باید به‌طور کامل خشک شود تا از شره کردن یا ایجاد رد قلم‌مو جلوگیری شود. پس از پایان رنگ‌آمیزی، مرحله فینیشینگ با استفاده از لاک شفاف، وارنیش یا پلی‌اورتان انجام می‌شود که از رنگ در برابر عوامل محیطی مانند رطوبت، خط و خش و گرد و غبار محافظت می‌کند. این لایه محافظ باعث افزایش دوام رنگ و حفظ زیبایی آن در طولانی‌مدت می‌شود.

دیدگاهتان را بنویسید

نشانی ایمیل شما منتشر نخواهد شد. بخش‌های موردنیاز علامت‌گذاری شده‌اند *